Table of Contents
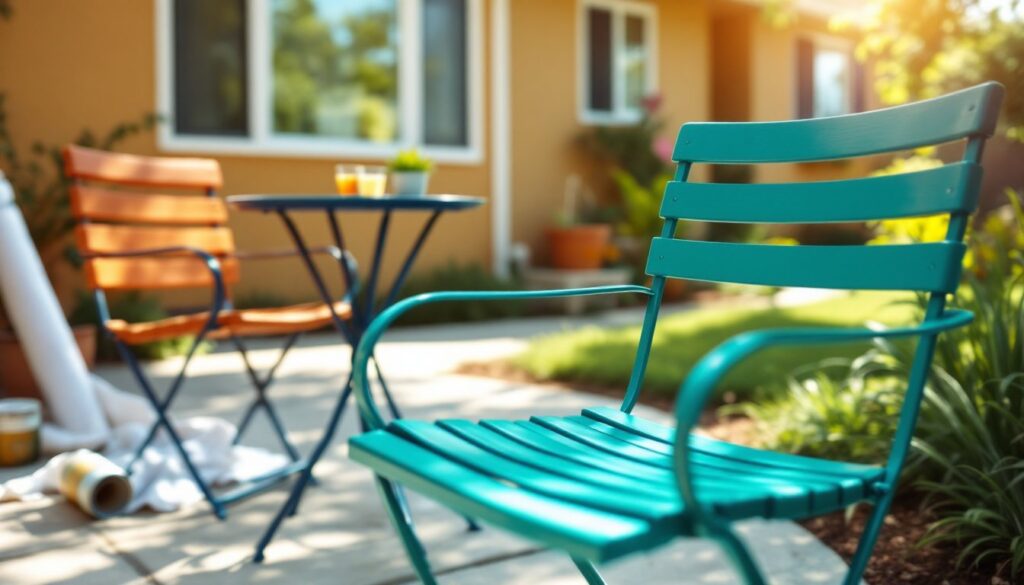
ToggleMetal patio furniture is built to last, but after a few seasons of sun and weather, it can look tired. Rather than replacing it entirely, painting is a cost-effective way to breathe new life into your outdoor setup. Colorful painted metal patio furniture transforms a bland backyard into a vibrant outdoor room, and the best part is you can do it yourself. Whether you’re refreshing a few café chairs or an entire seating area, this guide walks you through selecting the right paint, preparing your furniture, and applying color like a pro. The project takes a weekend, costs far less than buying new, and gives you complete control over the final look.
Key Takeaways
- Colorful painted metal patio furniture offers a cost-effective alternative to replacement, with materials costing $30–60 versus $100–300+ for new pieces, while protecting metal from rust and UV damage.
- Proper surface preparation—including cleaning, sanding, and rust treatment—is essential for paint adhesion and determining whether your finish lasts one year or five years.
- Choose outdoor-specific metal paints like acrylic latex (faster drying, easier cleanup) or oil-based enamel (superior durability, longer-lasting finish), both formulated with built-in primers for better coverage.
- Test paint colors in your yard using sample cans before committing, as natural sunlight dramatically changes color perception compared to indoor lighting or store displays.
- Apply thin coats in two to three layers with proper drying time between coats, using a combination of foam rollers and angled brushes for professional-looking results without overspray.
- Allow 24–48 hours curing time before use and maintain painted furniture with occasional touch-ups and clear topcoats every 2–3 years to keep your outdoor space looking fresh for 5+ years.
Why Paint Your Metal Patio Furniture
Metal furniture can corrode, fade, and look weathered even when it’s structurally sound. Paint isn’t just cosmetic, it protects bare metal from rust and UV damage while extending the life of your investment.
Cost is another compelling reason. A gallon of outdoor paint and basic prep materials run $30–60, while a single new metal chair costs $100–300. Painting lets you update your patio aesthetic annually if you want, experimenting with color trends without guilt. Over a few years, a painted refresh costs a fraction of replacement.
Personalization matters too. Stock furniture comes in limited colors, but when you paint it yourself, you pick the exact shade. Teal, terracotta, navy, coral, you’re not limited to what retailers stock. Many DIY enthusiasts enjoy exploring DIY furniture projects online for design inspiration before committing to a color scheme.
Finally, there’s the satisfaction factor. Watching dull aluminum or steel transform into a statement piece under your own hands creates real ownership. It’s a beginner-friendly project with professional-looking results, which keeps homeowners coming back for more DIY work.
Choosing the Right Paint and Colors for Outdoor Metal
Best Paint Types for Metal Furniture
Not all paint works on metal. Standard interior latex won’t adhere well and will peel quickly outdoors. Instead, look for outdoor metal-specific paints, either acrylic latex formulated for metal or, for maximum durability, oil-based enamel.
Acrylic latex metal paint is easier to apply and clean up with water. Brands formulate these with primers already mixed in, reducing prep steps. Coverage is typically 250–350 square feet per gallon, so a typical chair set needs only a quart. Drying time is 2–4 hours between coats. The downside: slightly less durable than oil-based options, though premium outdoor grades last 3–5 years in most climates.
Oil-based enamel adheres tenaciously to metal and resists UV fading better, lasting 5–7 years or more. The tradeoff is longer dry time (12–24 hours), strong odor, and cleanup requires mineral spirits. Both are valid: acrylic latex wins for convenience, oil-based wins for longevity.
Always check the can’s label for “exterior,” “outdoor,” and “metal” ratings. Avoid “all-purpose” paints, they’re often too thin for outdoor durability. Primer is usually built into modern metal paints, but if the furniture has rust stains or dark colors, a separate primer improves coverage and hiding power.
Color Selection and Design Inspiration
Color sets the mood. Warm tones like burnt orange, mustard, and terracotta feel inviting and hide dirt well. Cool tones like soft blue, sage, and charcoal offer a modern, calming vibe. Bold primary colors (bright red, yellow, cobalt) work for contemporary or eclectic spaces but can feel trendy fast.
Consider your home’s exterior color and landscaping. If your siding is warm tan, cool blues and greens make striking accents. If it’s gray or white, nearly any color works. For traditional spaces, muted pastels or classic navy feel timeless. Contemporary yards can handle jewel tones or unexpected combinations like dusty pink and deep green.
Test colors before committing. Buy sample-size cans (usually $5–8) and paint cardboard or scrap metal, then set it in your yard for a few days. Sunlight changes perception dramatically. Many DIYers explore painted metal bistro chairs and other finished examples online to see how colors look in real outdoor light. If you’re drawn to Home Depot Outdoor Furniture displays, note which colors appeal to you, your preferences often align with what works in your space.
Remember that metallics, high-gloss finishes, and matte surfaces affect how color reads. A gloss deep green looks richer than a flat version, while matte tones feel more sophisticated and less shiny. Most outdoor paints come in satin or semi-gloss finishes, which balance shine with durability.
Preparation and Painting Process
Surface Prep and Cleaning
Surface prep determines whether your paint sticks or peels. Skip this, and you’ll be repainting in a year. Spend an afternoon preparing, and it’ll last years.
Step 1: Clean thoroughly. Dirt, pollen, mildew, and oxidation prevent adhesion. Mix a solution of 1 part household bleach to 3 parts water and scrub with a stiff brush. For stubborn algae or mold, let the solution sit 10–15 minutes before scrubbing. Rinse with a hose and dry completely, paint won’t adhere to damp metal.
Step 2: Sand or wire-brush rough areas. Use 120–150 grit sandpaper or a wire brush attachment on a drill for pitted corrosion or peeling old paint. You don’t need to remove all the old paint if it’s adhered well: just rough it up so new paint grabs. Sand in circular motions, working into crevices. Wear safety glasses and a dust mask during sanding, metal particles irritate lungs and eyes.
Step 3: Address rust. For light surface rust, a wire brush or fine steel wool (0000 grade) works. For deeper pitting or flaking rust, use a rust converter product (spray or liquid) per the manufacturer’s instructions. Let it dry fully before painting. Heavy structural rust might require professional restoration, if holes are forming or metal is crumbly, the furniture may not be worth saving.
Step 4: Wipe down. Use a clean, damp cloth to remove dust, then let air-dry completely. Any remaining moisture or dust will trap under paint and cause adhesion failure.
Application Techniques and Best Practices
Protect your surroundings. Lay a drop cloth or cardboard underneath and around the furniture. Even careful painters drip or miss spots on edges. Mask off any rubber feet or casters with painter’s tape if you don’t want paint on them.
Choose your application method. A foam roller applies paint smoothly on flat surfaces and seats. A angled brush (1.5–2 inches) handles corners, spindles, and edges. A spray gun gives the smoothest, most even finish but requires more equipment and creates overspray. For most DIYers, a combination of roller and brush is faster and less wasteful than spray.
Apply in thin coats. One thick coat causes drips, runs, and uneven coverage. Instead, apply two to three thin coats, waiting 2–4 hours between coats (or per the can’s instructions). Thin coats dry faster, adhere better, and level out to a professional finish.
Paint technique matters. Roll or brush in the direction of the metal’s grain or lines if visible. On chair legs or spindles, paint from top to bottom so gravity works with you. On seats and tables, use long, even strokes. Avoid over-brushing, once paint is laid down, leave it alone. Extra brushing introduces air bubbles and prevents leveling.
Watch the temperature and humidity. Paint best between 50–85°F and below 85% humidity. Cold temperatures slow drying and cure time: high humidity can trap moisture. Plan painting for a clear morning or late afternoon, avoiding full midday sun, which can cause uneven drying and lap marks.
Cure time before use. Even after paint feels dry to the touch (2–4 hours), allow at least 24–48 hours before placing items on furniture or exposing it to rain. Full cure takes up to 2 weeks, so go easy on the furniture during that window. Oil-based paint needs even longer, allow 3–5 days minimum before heavy use.
Maintenance extends the life. Once painted, touch up nicks promptly and reapply a clear topcoat every 2–3 years if needed. Many homeowners find furniture projects on design sites include maintenance tips worth noting. Rinse furniture occasionally to remove salt spray or pollen if you’re coastal or in a dusty area. A painted metal bistro set treated this way can look fresh for 5+ years, far outlasting an untouched original finish.
Final Thoughts
Painting metal patio furniture is straightforward and rewarding. With the right paint, proper prep, and patience between coats, you’ll achieve results that rival professional refinishing. The real payoff comes when you sit in your vibrant outdoor space on a summer evening, knowing you created it yourself. Start small, a single chair or side table, to build confidence, then scale up to larger sets. Your backyard (and your budget) will thank you.