Table of Contents
ToggleThat old dresser collecting dust in your bedroom doesn’t have to stay that way. Furniture makeovers are one of the most satisfying DIY projects a homeowner can tackle, affordable, achievable, and instantly gratifying. Before-and-after bedroom furniture transformations don’t require professional skills, expensive tools, or a complete replacement budget. Whether you’re refreshing dated wood pieces, swapping hardware, or rethinking your layout, small changes deliver big visual impact. This guide walks through practical techniques that actually work, from paint and upholstery updates to smart repurposing strategies that breathe new life into pieces you already own.
Key Takeaways
- Before and after bedroom furniture makeovers cost significantly less than replacement—a $30 can of paint can transform a piece worth $300–500 new.
- Proper prep work, including sanding, filling damage, and using primer, is essential to achieving a durable finish that lasts years.
- Swap hardware, upholstery, or paint techniques like two-tone finishes to modernize old pieces without professional skills or expensive tools.
- Quality furniture paint ($20–30 per quart) outperforms budget options and prevents flaking, while mid-range supplies deliver professional results.
- Start with a single nightstand or dresser to build confidence and test your style before committing time and materials to entire bedroom sets.
- Repurpose and rearrange furniture strategically—old dressers become consoles, nightstands transform into plant stands, and layout changes revive awkward spaces.
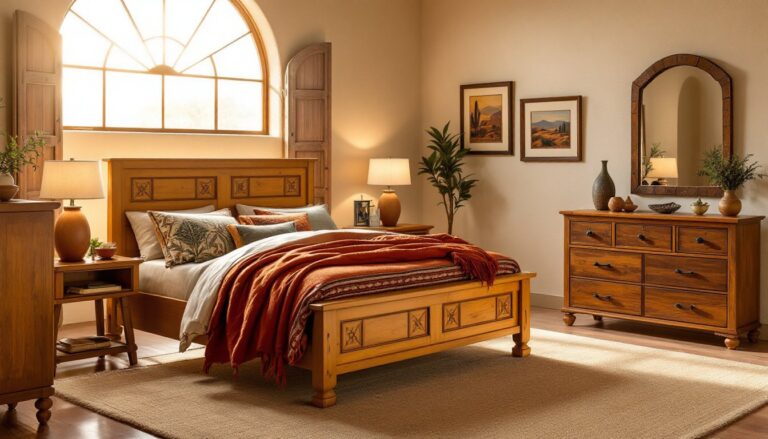
Why Old Bedroom Furniture Deserves a Second Life
Tossing perfectly solid furniture creates waste when a thoughtful makeover extends its life by a decade or more. Old bedroom pieces, dressers, nightstands, bed frames, are often built from quality hardwoods and quality joinery that modern mass-produced furniture rarely matches. A dated finish or worn upholstery doesn’t diminish the underlying structure.
Beyond sustainability, makeovers cost far less than replacement. A $30 can of quality paint and a few hours of work can transform a piece that would cost $300–500 new. Projects like these also let you customize to your exact aesthetic and space, no settling for off-the-shelf options that almost fit your room. Plus, there’s genuine satisfaction in seeing a piece you’ve invested time in become a focal point rather than an afterthought.
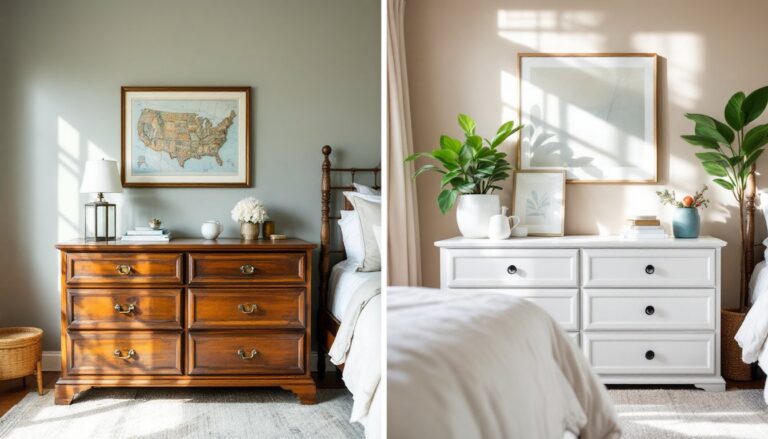
Simple Paint Transformations for Dated Wood Pieces
Paint is the fastest, cheapest way to modernize old wood furniture. The key is proper prep and the right finish, skip this and you’ll sand it all back down in two years.
Prep work determines success. Start by assessing the current finish: glossy finishes need scuffing so new paint grips: if there’s old lacquer or shellac, primer is essential. Remove drawers, hardware, and doors. Dust everything thoroughly, then sand with 120–150 grit paper to dull the surface. Fill any visible damage with wood filler: let it cure, then sand flush.
For cabinets and dressers, use a high-quality furniture paint or cabinet enamel, semi-gloss holds up better than flat finishes in bedrooms. Primer goes down first on bare wood: one coat usually suffices if you’re painting over a similar color. Two thin coats of paint beat one thick coat: thick applications run and take forever to cure. Let each coat dry per product instructions (usually 4–6 hours between coats). People like results they see on sites like Young House Love often skip the drying time and rush assembly, don’t do that.
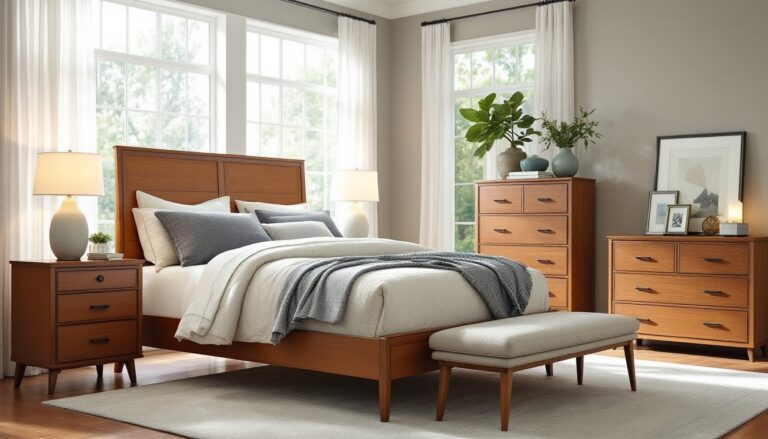
Refinishing Techniques That Make a Dramatic Difference
Beyond solid color, two techniques elevate a makeover from basic to striking. Chalk paint adheres without primer, dries fast, and creates a matte, velvety finish popular for farmhouse or cottage aesthetics. It costs more but saves prep time on pieces with intricate details or multiple finishes.
Two-tone finishes, painting the frame one color and drawer fronts another, add visual interest without complexity. A dark stained base with cream or white drawer fronts works on many styles. Tape edges carefully with painter’s tape and remove it while the final coat is tacky (not fully dry) to prevent peeling.
For pieces with veneered tops or inlays you want to preserve, spray paint saves detail work. Rented spray equipment ($15–30 per day) covers curves and ornamental edges faster than brush painting, though ventilation is critical, only spray outdoors or in a well-ventilated garage. Always wear safety glasses, a respirator rated for paint fumes, and nitrile gloves.
Upholstery and Hardware Swaps for Instant Updates
Hardware and fabric refresh old pieces without touching the wood. New drawer pulls, knobs, or handles cost $5–15 each and change a dresser’s entire character in minutes. Modern brass, matte black, or ceramic hardware instantly dates a piece forward. Remove old hardware by unscrewing from inside (or drilling out riveted pulls). Measure the hole-to-hole distance to ensure new hardware fits existing holes: if holes don’t align, fill old ones with wood filler and drill new ones.
For upholstered headboards, benches, or ottoman-style pieces, fabric swaps extend life dramatically. Remove old upholstery by unstapling or cutting it away. Mark how many layers exist (usually batting and fabric), keep the old pieces as templates, and buy matching thickness batting from fabric suppliers. Wrap the frame in new batting, then stretch fresh fabric, linen, performance fabrics, or patterned textiles, and staple to the frame back. A power stapler ($40–80 purchase or $15 rental) makes this job feasible for one person.
Upholstery foam, if compressed or flattened, can be replaced wholesale by an upholsterer (usually $300–600 for a headboard), but simpler fabric-only swaps are pure DIY. Make sure the existing structure is sound, sagging or broken springs require professional repair.
Rearranging and Repurposing: Layout-Based Makeovers
Sometimes the makeover isn’t the furniture, it’s the arrangement. A bedroom setup that felt cramped or awkward for years can become functional and stylish by simply rotating pieces or moving them to opposite walls. Before you commit, sketch the room layout and test placement: does the dresser work better as a TV stand? Can the nightstand become a corner accent table?
Repurposing takes this further. An old dresser becomes a entryway console or bathroom vanity in another room. A bed frame with storage drawers under becomes a platform in a home office or guest room with different styling. Small nightstands work as plant stands, side tables for reading nooks, or even bathroom organizers. Making Manzanita showcases many projects where a single piece gets relocated and reimagined rather than discarded.
Before relocating heavy pieces, measure doorways and the new space carefully. A dresser that barely fit your bedroom might not fit anywhere else without angling or removing legs. Take photos of current placement so you can remember original dimensions if needed. Good lighting in the new location matters too, a piece that looked dated in dim corners might shine in well-lit areas.
Budget-Friendly Makeover Strategies You Can Do Yourself
Start small with one piece rather than your entire bedroom set. A single dresser or nightstand teaches technique, builds confidence, and shows whether you like the results before committing time and materials to bigger projects. Nightstands are ideal: smaller surface area, fewer drawers, and mistakes are less visible.
Source affordable secondhand furniture from estate sales, Facebook Marketplace, or Craigslist, solid pieces with “bad” finishes are perfect makeover candidates and cost a fraction of retail. Avoid pieces with active damage (water stains that won’t sand out, broken joints, or mold), but cosmetic issues are your opportunity. A dresser listed at $40 because the finish is tired can become showpiece-worthy for $50 in materials and six hours of work.
Essential tools and materials for most makeovers:
- Sanding sponges or paper (120, 150 grit)
- Wood filler
- Primer (oil- or water-based, depending on finish)
- Furniture paint or enamel (1 quart covers roughly 400 sq. ft.)
- Paintbrushes (angled and flat, quality synthetic bristles resist paint buildup)
- Painter’s tape
- Drill-driver (for removing/installing hardware)
- Staple gun (if upholstering)
- Safety gear: gloves, goggles, respirator for sanding and spray work
Paint quality matters, cheap paint shows thick, covers poorly, and doesn’t cure hard. Mid-range furniture paints ($20–30 per quart) deliver professional finishes and durability. Skip discount brands that promise quality but thin and flake within months. Sites like Addicted 2 Decorating detail budget approaches without corner-cutting on quality essentials.
Planning extends budgets too. Work on one or two pieces per season rather than all at once. You’ll spread costs, avoid decision fatigue, and learn from each project. If a first makeover teaches you that glossy finishes aren’t your style, the next project benefits from that insight.
Conclusion
Bedroom furniture makeovers turn overlooked pieces into curated, intentional décor without replacement costs. Whether you’re refreshing finishes, swapping hardware, reimagining layouts, or upholstering, the work is manageable and the results are tangible. Start with one dresser or nightstand, follow prep carefully, and you’ll transform not just the furniture but how your bedroom feels. The best makeover is the one you actually finish, so pick a project, gather materials, and start moving dust.